Copy of Article Text Below
Servicing And Repairs
These notes are necessarily abbreviated, and are provided for guidance only. For more detailed information, please refer to the workshop manual relevant to your specific model. As an example, the data shown here relates to cars with the 1298cc engine.
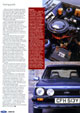
There's plenty of spanner-wielding space within a Fiesta's engine bay compartment, and in virtually all respects the Mkls are easy to look after. Notable exceptions to this general rule include the distributor ('buried' behind the engine, and difficult to reach), also the rear brakes. To carry out a full inspection of the rear brakes, the hub/brake drum assemblies need to be dismantled, which tends to discourage regular checks. However, small inspection apertures are provided in the backplates, which permit a check of the remaining shoe lining thickness, but not the condition of the wheel cylinders.
Recommended service intervals are 6000 miles (or annually, whichever comes first), but for optimum engine life it's worth changing the engine oil and filter every 3000 miles.
Valve Clearances
Remove the screws securing the valve cover, having first unbolted and removed the entire air filter assembly (10 mm spanner). The valves run ex-in-ex-in-ex-in-ex-in, from the crankshaft pulley end. The valve clearances (cold) are inlets, 0.25 mm (0.010 inch); exhausts, 0.55 mm (0.022 inch). With the valves on No. 1 cylinder 'rocking' (that is to say one opening, one closing), check/readjust the valves on No. 4; with the valves on No. 3 rocking, check/readjust those on No.2; with the valves on No. 2 rocking, check/readjust those on No. 3; with the valves on No. 4 rocking, check/readjust those on No. 1. Ideally use a new valve cover gasket on reassembly.
Lubrication Engine Oil And Filter
With the front of the vehicle raised on ramps, drain the old oil while the engine's at normal working temperature (use a 13 mm ring or socket spanner for the sump plug). The refill capacity of the sump is 3.25 litres (5.7 pints) including the filter. Use a 'full-bodied' high quality multigrade (for example 15W50, 20W50 or 20W60 grade).
Transmission Oil
With the vehicle level, release the transmission unit's filler/level plug (22 mm spanner). Check that the lubricant within is up to the lower edge of the filler aperture. If necessary, top up using SAE80EP oil. The total oil capacity is 2.8 litres (4.9 pints).
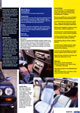
Ignition System Spark Plugs
Check/clean/re-gap the plugs every 6000 miles; renew them regardless every 12,000 miles. The plugs are located at the extreme front of the engine, and are easily reached. Use a 16 mm. (5/8 inch AF) plug socket to unscrew them; be careful not to over tighten on installation - apply a little copper-based anti-seize compound on the threads. The plug specification is Motorcraft AGR12 or equivalent, gapped to 0.6 mm (0.025 inch).
Distributor/Timing
Examine the low and high tension cables for condition, also check their connections for corrosion. The distributor is difficult to get at, so you need to take extra care to ensure that the contact breaker points are correctly fitted/adjusted. Set the contact breaker gap to 0.64 mm (0.025 inch), which should correspond with a dwell angle reading of between 48 and 52 degrees (maximum variation 4 degrees). The ignition timing marks are located on the crank pulley and the timing cover, and can be made more easily visible by applying white paint or Tippex. The static setting is 6 degrees BTDC. To rotate the engine when checking, engage top gear and very slowly pull the car forwards (on level ground only).
Breathing/Carburation, Breather System
It is crucially important to ensure 1 that the breather system does not become blocked. At each service, examine the condition of all the pipework, also the gauze filter in the oil filler cap, ensuring that there's no obstruction. If the gauze is visibly dirty, remove it and swill in clean paraffin; carefully dry with fluff-free rag before refitting.
Air Filter
Take off the filter housing's lid (secured by two nuts; use a 13 mm spanner) and remove the element. Wipe the case clean using a rag dipped in water dispellant spray. Renew the element at least every 24,000 miles/two years.
Carburettor
At each service, check all fuel pipework and connections. Only adjust the carburettor (using a workshop manual as a guide) after the valve clearances and all ignition aspects have been dealt with; the engine needs to be at normal operating temperature too. Ideally make carburettor adjustments in conjunction with a CO meter. If necessary, adjust the mixture to give 1.5 per cent CO (+/- 0.25 per cent) with the air filter assembly fitted, the idle speed at 700 rpm, and the cooling fan running.
Brakes General
Every week, check the brake fluid level - if the level is low, investigate immediately and rectify the cause of the leak. At each service, examine the condition of the fixed pipework and flexible hoses. At least every three years/36,000 miles, renew the brake fluid. Check the operation of the brake servo (where a servo is fitted); and its servo pipework and connections.
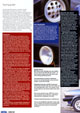
Front Brakes
In order to carry out a comprehensive check of the discs and pads, first take off the front wheels. Ensure that wear on the pads is even, and replace them when the thickness of the remaining friction material is nearing 3 mm (1/8 inch).
Rear Brakes
With the wheel removed, extract the grease cap, split pin, nut retainer, hub nut and brake drum/bearing assembly. Check the linings for wear - recommended minimum depth of friction material is 3 mm. (1/8 inch.) - and the cylinders for fluid leaks. On reassembly, tighten the hub nut (while rotating the hub), to approximately 27 Ibf.ft, then slacken the hub nut 90 degrees, refit the nut retainer and install a new split pin to secure the assembly in place.
Handbrake
Examine the linkage to ensure that all components (including the pivots and the equaliser link/wheel) operate freely; lubricate at each service. If handbrake lever travel becomes excessive due to stretching of the cable, slacken the lock nut (13 mm spanner) and rotate the cable adjuster nut (13 mm spanner) so that the brake is fully applied at approximately four 'clicks' of the handbrake lever ratchet.
Retighten the lock nut, recheck brake operation and finally ensure that the rear wheels rotate freely with handbrake lever in the fully off position.
|