Copy of Article Text Below
.....1700cc cross-flow engines. An increase to 1340cc was decided for our Fiesta's 1300 cross-flow. After boring, the block was then Crosshatch honed and machined to ensure it was totally flat; a process which guards against future head gasket failure. Geoff uses a fly cutter in preference to a surface grinder for this machining, considering that the fly cutter provides a slightly rougher finish and gives the head gasket more to key to.
With the block bored and the machined faces thoroughly masked, it was then painted and new core plugs fitted. The cylinder block was then fitted on an engine stand ready for assembly. Before assembly the piston rings were checked for gap and condition, this being important as a tight ring gap can lead quickly to excessive bore wear and a too wide gap can lead to compression losses.
The crankshaft was then reground and dynamically balanced, then checked for size. Problems missed at this stage can be disastrous.
The shells were then fitted to the cylinder block and the crankshaft fitted. The pistons and conrods were individually balanced, then assembled, and the circlips checked to ensure that they were fitted in the groove correctly. As the assembled pistons and conrods were fitted in the block attached to the crankshaft it was ensured that as each one was fitted the crankshaft could still rotate freely. The big end caps and main bearing caps were then torqued-up to the correct poundage and each piston was checked ensuring they were all the correct height by using a dial test indicator gauge (DTI).
With most of the bottom end intact the camshaft was next.
The lobes on a performance camshaft have a different profile and timing to the standard ones, which directly affects the way in which the valves operate. A good cam is designed to lift the valves quicker, higher and for longer periods of time thus encouraging a larger amount of fuel and air to flow into the cylinder head. For the Fiesta, Geoff selected a Kent Cams Fireball 234, considering it to be one of the best fast road cams on the market. This particular cam has a valve lift of 11.16mm, and a duration of 280° and produces a perfectly adequate powerband between 2000 and 7200rpm.
The camshaft and cam followers are fitted with the engine upside down. It is vitally important to soak each of the cam followers in cam lube first. The high concentration of zinc dithio-sulphate in the cam lube provides continual lubrication during the start-up period before full oil pressure has been achieved.
The cylinder head chosen for the Fiesta was one of Go-Jo's Headmaster range which can be bought on an exchange basis. A modified cylinder head is a very good way of achieving more power. Changes made to Go-Jo's head are widened and smoothened exhaust and inlet ports and the removal of any protrusions in the casting. The head face is highly polished and, in the case of the Fiesta, the inlet valve sizes are enlarged to 39.14mm and the exhaust valve diameter is enlarged to 33.90mm. Extra-strong double valve springs were used, with the valves machined flush with the head face. The rockers were then fitted and the valve lift checked and, by using the DTI again, each rocker was individually checked to ensure maximum lift.
The now complete engine was refitted to the car, and after checking the anciliaries were in pristine condition, these too were fitted. Oil pressure was achieved by spinning the engine with the spark plugs removed. With the plugs refitted the engine was started for the first time. Once the engine was warm, the head was re-torqued and the tappets re-set.
At the time of writing we are still deciding on the ideal carburettor, but it will certainly be a twin-choke. Running on its standard carburettor is not entirely satisfactory in view of the engine modifications. To get rid of unwanted gases, a full Janspeed manifold and exhaust system is being used which, while being very efficient, also adds the all-important throaty exhaust sound!
Until we choose the correct carburettor it is of little advantage to test the car for power figures on the rolling road. The car is, however, now run in after 1000 carefully-driven miles and a change of oil and filter. I am pleased to report that it has remained reasonably tractable, particularly during round-town use. While there isn't a huge amount of power below 2000rpm the car remains smooth and progressive, and therefore easy to drive. At 2000rpm and beyond it really starts to come 'on the cam' with a very wide powerband.
Next month we'll be looking at the bodywork and interior and then finishing off with a rolling road test, brakes and suspension. Special thanks go to Geoff and everyone at Go-Jo for building a snorty little engine, which when fitted with the correct carburettor is surely going to make the car very rapid. If anyone would like to know more, or would like to do the same to their 1300 then Go-Jo can be found at Dept C, Portland St, Barrowford, Nelson, Lancashire BBG 8PY. (0282 602524).
Captions -
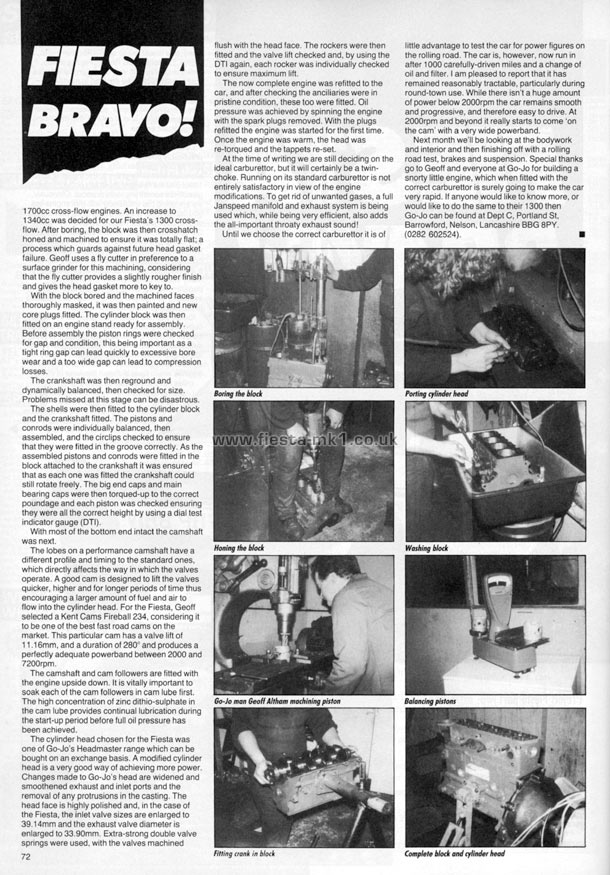
Left-Right - Boring the block - Porting cylinder head - Honing block - Washing block - Go-Jo man Geoff Altham machining piston - Balancing pistons - Fining crank in block - Complete block and cylinder head
|