Copy of Article Text Below
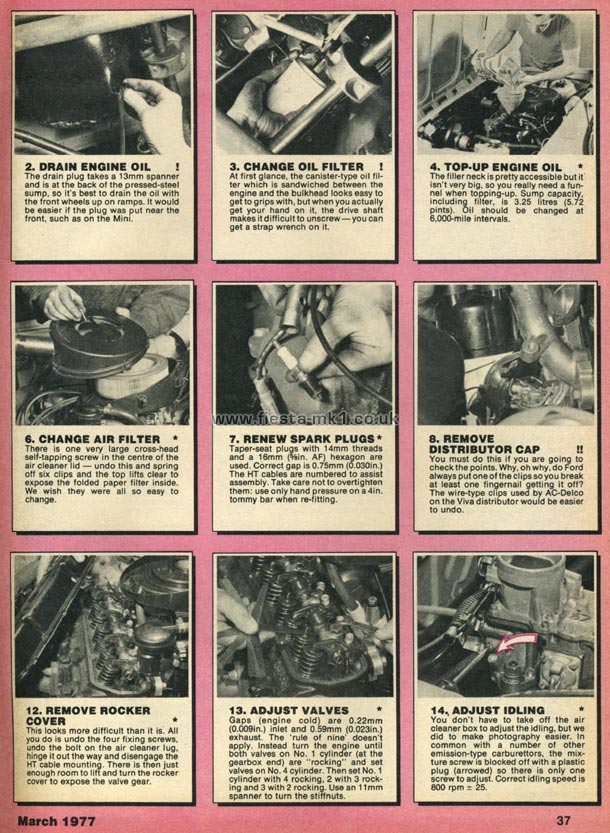
2. DRAIN ENGINE OIL !
The drain plug takes a 13mm spanner and is at the back of the pressed-steel sump, so it's best to drain the oil with the front wheels up on ramps. It would be easier if the plug was put near the front, such as on the Mini.
3. CHANGE OIL FILTER !
At first glance, the canister-type oil filter which is sandwiched between the engine and the bulkhead looks easy to get to grips with, but when you actually get your hand on it, the drive shaft makes it difficult to unscrew - you can get a strap wrench on it.
4. TOP-UP ENGINE OIL *
The filler neck is pretty accessible but it isn't very big, so you really need a funnel when topping-up. Sump capacity, including filter, is 3.25 litres (5.72 pints). Oil should be changed at 6,000-mile intervals.
6. CHANGE AIR FILTER *
There is one very large cross-head self-tapping screw in the centre of the air cleaner lid - undo this and spring off six clips and the top lifts clear to expose the folded paper filter inside. We wish they were all so easy to change.
7. RENEW SPARK PLUGS *
Taper-seat plugs with 14mm threads and a 16mm (5/8in. AF) hexagon are used. Correct gap is 0.75mm (O.O3Oin.) The HT cables are numbered to assist assembly. Take care not to over-tighten them: use only hand pressure on a 4in. tommy bar when re-fitting.
8. REMOVE DISTRIBUTOR CAP !!
You must do this if you are going to check the points. Why, oh why, do Ford always put one of the cl ips so you break at least one fingernail getting it off? The wire-type clips used by AC-Delco on the Viva distributor would be easier to undo.
12. REMOVE ROCKER COVER *
This looks more difficult than it is. All you do is undo the four fixing screws, undo the bolt on the air cleaner lug, hinge it out the way and disengage the HT cable mounting. There is then just enough room to lift and turn the rocker cover to expose the valve gear.
13. ADJUST VALVES *
Gaps (engine cold) are 0.22mm (0.009in.) inlet and 0.59mm (0.023in.) exhaust. The 'rule of nine' doesn't apply. Instead turn the engine until both valves on No. 1 cylinder (at the gearbox end) are "rocking" and set valves on No. 4 cylinder. Then set No. 1 cylinder with 4 rocking, 2 with 3 rocking and 3 with 2 rocking. Use an 11mm spanner to turn the stiffnuts.
14. ADJUST IDLING *
You don't have to take off the air cleaner box to adjust the idling, but we did to make photography easier. In common with a number of other emission-type carburettors, the mixture screw is blocked off with a plastic plug (arrowed) so there is only one screw to adjust. Correct idling speed is 800 rpm +/-25.
|